Showing posts with label Accessories. Show all posts

Wednesday, January 25, 2012

Bit of Pretty

And just HAD to share. I bought the pitcher and silk flowers at TPT for around $35. I'm in love. Are you? :)/ Crazy 2


Monday, January 16, 2012

Lace Candle: Tutorial

Crazy 2 today-- Showing you how to make these super easy super gorgeous, super easy, lace candle.
Here's what you'll need:
Candle, Mod Podge, Lace, Sponge Brush, Scisors

Coat candle in Mod Podge
Measure and cut lace. Wrap around Candle. Cover outside with Mod Podge.

Let dry, Trim edges and you're done! Crazy 2 over and out. :)

Wednesday, February 9, 2011

Bedroom B&A

Crazy 2 finally back with some bedroom updates. So remember my old yucky bedroom?

EW!!!
Then remember the after?


Well this is what it looks like now.

YUM!


I just get that relaxed "ahhhhhhhh" feeling whenever I walk in. It's so satisfying to see something you love and know that you did that! This is exactly the feeling I was going for. Soft, sophisticated, chic, romantic, and most of all... relaxing. So good to be home.

It's still needing a few finishing touches..... like a door. haha. but we'll get there. We don't have kids yet, so we're not in dire need of privacy at the moment. lol. But ohhhhhhh! i love it so much! I also took down the headboard to re-do it. It didn't turn out as tufted and lavish as i'd like, so back to the workshop it went. :)

But, I did install these myself yesterday.

I got these sconces for us for Christmas off of ksl.com for $10 a piece. (Can you say score?) They had never been used since the original owner bought the wrong type of sconce on clearance and they wouldn't exchange them. And best of all, they were just right up the street from where I live! Nice. I still need to spray paint them a brushed nickel since that's our accent metal in this room. But one thing at a time. ;)
I love them so much! They totally give our room a hotel-like feel. And once I finish the headboard re-do as mentioned above, that will only add to that feeling. Can't wait! Here's also some more accessory before and afters.
All of the accessories in our bedroom I either made, bought at the D.I. and gave it new life, or bought it for $1 or less. Definite decorating on a budget.

NEVER under estimate the power of spray paint!

These were still in their box when i found them at the D.I. $5.00


Bit o'spray paint. :)
And ta da!
How lovely and dainty!

Shelves & Mirror:

Bought all at D.I. for $1.00 each

I ALMOST passed this mirror up when I was shopping at the D.I. Now I wonder if I was out of my mind at the time. It's totally gorgeous. and just a buck!
Ugly now, but.....

Apply the magic of spray paint:

AND.... voila.. instant fabulous!

Check back later for more design on a budget tips! 'Til then, keep creating!
-Crazy2

Wednesday, September 22, 2010

Crochet Hair Accessories

Hey, Bloggers! Crazy #2 here! And THIS is what I made today and what I'll be sharing with you!


So.... as a super girlie girl, I LOVE all things feminine. Interior design, jewelry, fashion, PINK and oh my stars... you should see my shoe closet (I think I lost count at 100 pairs...not kidding). So, needless to say, when it comes to any kind of fashion accessory, I'm always a sucker. But the problem is they're all so dang expensive!! I mean, who want's to pay $10 for a thing you put in your hair that you can only wear twice a month at the most without it looking tacky and like you wear the same thing every day? For me, it's the small fashion statements that set you apart from how other people dress. But how are you supposed to do this when you have a lot more important things to pay for? Answer! MAKE THEM!! For these crocheted flowers, I was totally inspired by the head wraps that came into fashion this last winter:

And decided to take a stab at crocheting. Unfortunately, I haven't ventured into doing the full wrap yet... I'm pretty sure I'm not that talented. And I'm also pretty sure they won't look fantastic on me... Maybe that's the real reason I haven't really tried haha! So instead I decided to focus on the flower


Looks pretty pro eh? SECRET!! It's not! Just knowing some very basic crochet skills and watching THIS video tutorial on youtube you can get some pretty fabulous results! I know I did! If you're unsure what the crochet lingo means, you can search other videos for the term(s) you don't understand. There are lots of beginner tutorials on crocheting that will show you exactly which stitches are what and how they effect your piece. The lady's voice in these videos kinda drives me crazy, so i listen to it at a low volume. I also have modified her pattern so stay tuned into the post to see my results!


Now, the first time I watched her video, I followed it exactly because I was still learning the basics of which stitches made what shapes. But once I understood the principles involved, I was able to modify the pattern I used into exactly what I wanted it to look like. Also, when I followed her pattern. The flower turned out WAY too tiny! And if I'm going to be sporting something... it's got to make a statement. And almost always that statement is "go big or go home" This is a pic of what her pattern made, compared to the ones I made today. The one on the right is the flower from the pattern.
Sure, the small flower might be cuter for a baby or something, but for me, it's just way too super teenie weenie! In the video, I think she says at the beginning to chain 17 links. Since I wanted it huge, I chained--wait for it--71. Whatever number you choose, make sure it's an odd number so that the stitching will come out evenly when you come back. The slinky was about a foot and a half long when I had chained it all.


If you follow the rest of her pattern, yours will turn out similar to mine. Just keep in mind that on your first one, you WILL be slow and it WILL be ugly if you're not familiar with crocheting. Even if you are, it STILL might be ugly. Don't be discouraged. The same thing happened to me. Just be sure not to cut the yarn off from the ball so that you can unravel it and try again (and we're not wasting yarn here).

The yarn I used, I just bought it at Wal*Mart and was less than $2 for the ball. The brand is sugar'n cream. That yarn has worked best for me because it doesn't fray like the softer varieties do. When the yarn frays, it's hard to see the detailing and makes it look more like a nest than a flower, and who wants to wear that on their head? You can get 3-4 flowers out of the ball of that brand, so if you have daughters-- you can make matching ones for all of them! (I can't wait to be a mom... my girls will be decked out!!) Cheap and easy right? I'm able to make one in the time it takes to watch my favorite TV show.

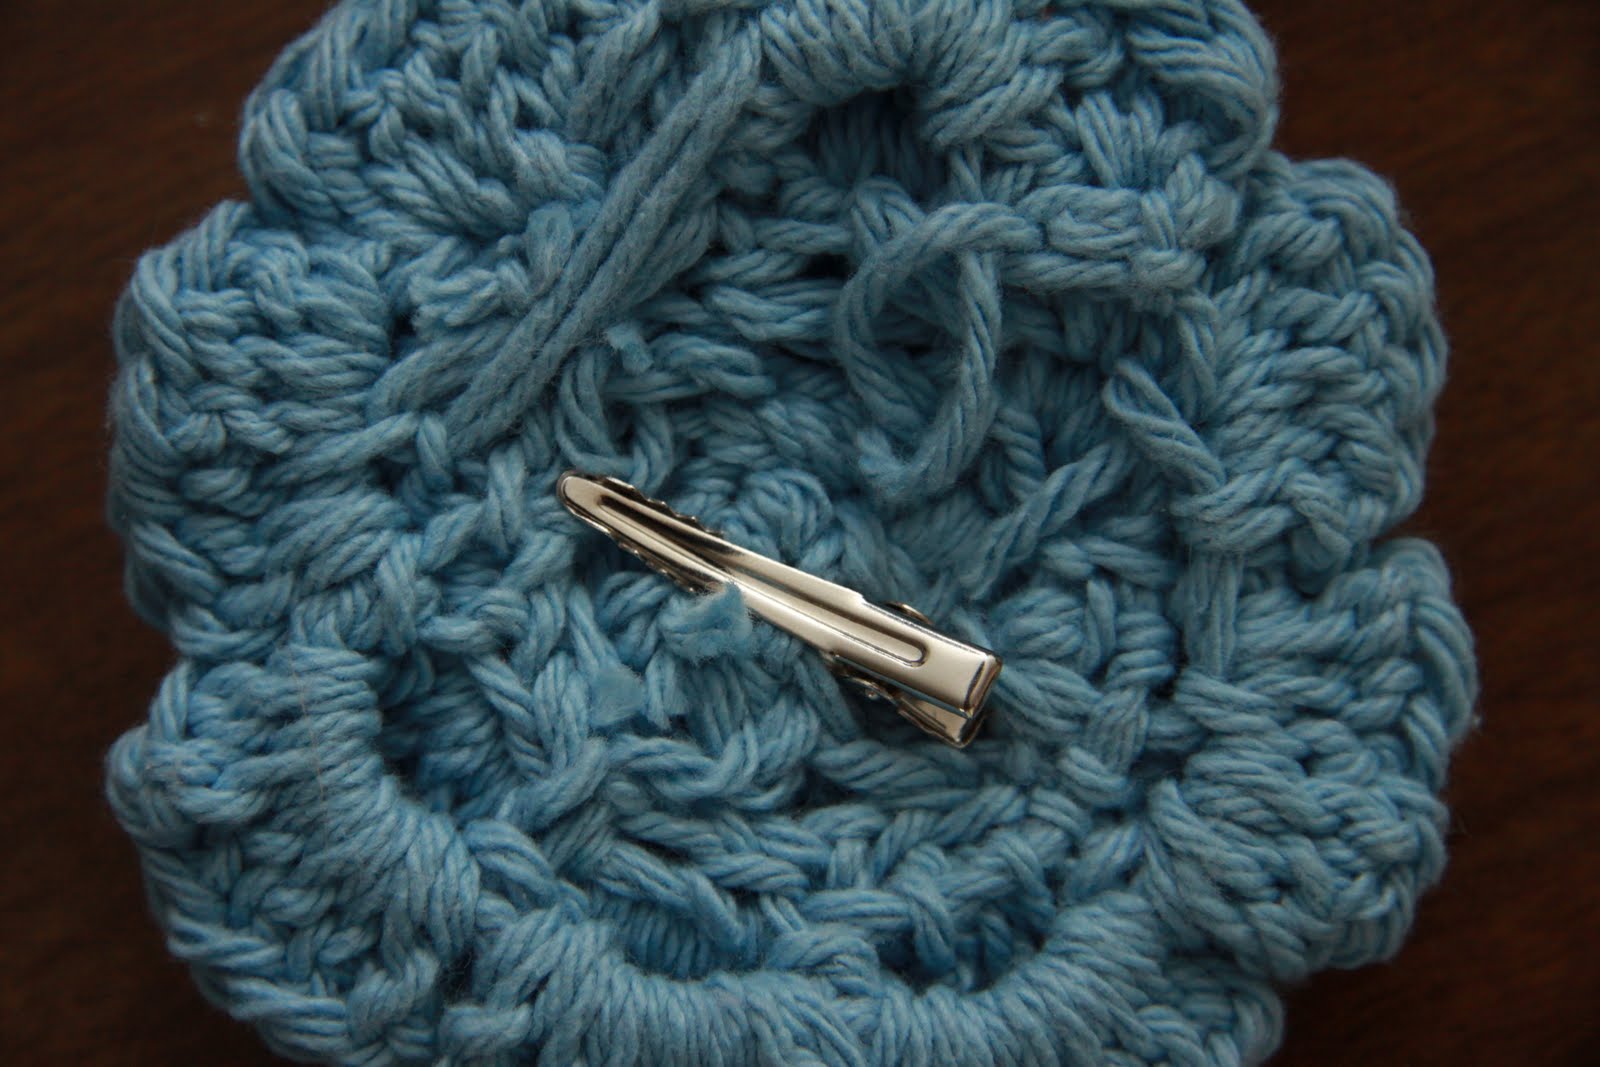
To finish the project, you'll also need and embroidery needle to stitch the slinky flower together. You can find these anywhere for a couple dollars and you'll have it for any future projects of this nature. You'll also need felt, hot glue, and an alligator clip. For the sake of time, I simply threaded the alligator clip through the yarn and clipped it to my headband.

But normally, I'd hot glue a circle of felt to under side of the flower, then hot glue the alligator clip to the felt. I like to have them not directly secured to anything like a headband or clothing because then you can use it as several different accessories without having to make more. And thats it! Voila! Super cheap, super cute hair accessories that you'll get dozens of compliments on.

And the best part is, whenever someone tells you they like the flower/headband or whatever you wear it as... you'll be able to say "Thanks! I made it!" Then you get to enjoy the impressed look on their face that says 'how awesome are you!' And believe me, there's not many things as satisfying as knowing you made something awesome. Get your crochet hooks out ladies!!

Expense breakdown:
  • Yarn $1.98
  • Crochet hook $3.00
  • Embroidery needle $0.99
  • Alligator clip $0.15 each (they come in packs of 20 at hobby lobby)
Total start up cost:

$7.57

Total cost of each flower once all supplies are purchased:
$0.50

Not bad right? This is Crazy #2 and thanks for stopping by! Hope you enjoyed it!

-Crazy 2

Monday, September 20, 2010

Flower Pot Makeover!

First post! First post! Here we go!


Crazy 2 comin' at ya here!


To start off... little bit about me. My sweetie and I are coming up on being married for 2 years... we just bought our first house in May and are super excited to redo.... everything (well, at least I'm excited, hehe!). We've been kinda slow at making it our own... we procrastinate. Working room by room goes slower than one would think, at least for us it does. So as we're woking on getting new paint and carpet for the bedrooms, i've been scouring 2nd hand stores for old treasures to revamp! I'm way into (especially lately) finding something old and making it new... and doing it inexpensively to boot!!


For this project, can i just say... I LOVE orchids!!! I've been looking for a decent silk arrangement for a while, because 1) live plants die in my house hold and 2) Danny's allergic to a lot of naturey stuff!... but one that looks halfway decent = $$$. The other day i went to Ross and lo and behold... i found the one! Freaking fabulous and only (drumroll please) $6.99!!!! (Insert happy dance here). Only problem. the vase it was in... HEEEEEEDIOUS!! But i knew i could fix that in a heartbeat. Unfortunately, i demoed it and got rid of the vase before i thought to take a picture (sorry Crazy 1) so you can't see how bad it was... anyway... So i snatched the little beauty up and took 'er home.


Plan A:


So i had this small little vase that i bought at the D.I. and decided to go kinda out of the box on the color... Pink. Yeah-- turned out AWFUL!!


Plan B:


Found this light fixture at the D.I. for less than a dollar.


And I decided to turn it upside down and make it a planter.


To start, I spray painted the inside white so that my filler would not show through the translucent glass.


Then i hot glued the foam ball to the bottom of the fixture and stuck the flowers in the foam. And then i filled the dead space with crumpled up computer paper (normally i would have used news paper, but i just wanted to be safe about not letting the anything show through the glass). This is what it looked like at that stage.


Then I hot glued some of these rocks:


to the foam ball so they wouldn't get dislodged in case it ever got bumped.


And last step... i just filled in the rest of the fixture with rocks. Easy peasy! The whole project took me about an hour... Totally worth it. This baby is going on my coffee table and you'll see it in its new home soon. I also have 1 more step before it's completely finished... i need to find something to attach to the bottom so it sits completely flat. as of right now it's a teeny bit wobbly. But i still love it. What do you think?


Expense breakdown:

  • Flowers: $6.99
  • Bowl: $0.75
  • Foam ball: $2.00
  • Rocks: $3.00
  • I already had the paper, hot glue and spray paint. And I only used a fraction of each, so i won't try and break down how much that cost.... I'm sure it totals less than $1 though.

Total cost: $12.74 + tax -- can't beat that!!

Feel free to leave some love! (aka comments)


-Crazy 2